



Thursday, August 29, 2013

Happily Ever After PTU by Kising Kate Purchase at Sweet Pinups
Art work of Barbara Jensen
Mask of Choice i am using one from the Creative Misfits
New Transparent Raster Layer 700x700
Open frame 3 copy and paste as new layer
resize down 1 time by 80% and free rotate to the left by 90%
Open paper 3 copy and paste as new layer
Move below the frame layer and erase all parts on the outside
Open paper 2 copy and paste as new layer
Open your mask
Move below all other layers
Go to Layer, New Mask Layer from image
Select from Drop down and hit ok
Merge Group
Open your close up tube layer
copy and paste as new layer
Move below the frame layer to the right and erase all parts on the outside
Add a Luminance
Open full tube layer copy and paste as new layer
Move to the left above the frame layer
Duplicate Frame and move above the Tube
Erase the parts of the tube on the bottom outside of the tube
Now highlight the duplicated frame layer and erase parts
covering the tube
open element 47 copy and paste as new layer
Move below the original frame layer and to the bottom Right
erase all on the outside
open element 35 copy and paste as new layer
Move above all other layers and to the bottom
resize down 2 times by 80%
Open element 33 copy and paste as new layer
resize down 3 times by 60% and move to the bottom Right above all
other layers
open element 15 copy and paste as new layer
resize down 3 times by 60% and move to the bottom Left
open element 14 copy and paste as new layer
resize down 2 times by 60% and again by 80% 1 time
Move above element 15 on the bottom left
open element 24 copy and paste as new layer
resize down by 80% about 6 times
Move to the right below the jewel
open element 13 copy and paste as new layer
resize down 2 times by 60%
Move above all other layers
the heel on the top of the mask
open element 12 copy and paste as new layer
resize down 2 times by 60%
move to the left below the slipper
Open Element 44 copy and paste as new layer
Move above all other layers and to the right of the book
add name copyright and save
Art work of Barbara Jensen
Mask of Choice i am using one from the Creative Misfits
New Transparent Raster Layer 700x700
Open frame 3 copy and paste as new layer
resize down 1 time by 80% and free rotate to the left by 90%
Open paper 3 copy and paste as new layer
Move below the frame layer and erase all parts on the outside
Open paper 2 copy and paste as new layer
Open your mask
Move below all other layers
Go to Layer, New Mask Layer from image
Select from Drop down and hit ok
Merge Group
Open your close up tube layer
copy and paste as new layer
Move below the frame layer to the right and erase all parts on the outside
Add a Luminance
Open full tube layer copy and paste as new layer
Move to the left above the frame layer
Duplicate Frame and move above the Tube
Erase the parts of the tube on the bottom outside of the tube
Now highlight the duplicated frame layer and erase parts
covering the tube
open element 47 copy and paste as new layer
Move below the original frame layer and to the bottom Right
erase all on the outside
open element 35 copy and paste as new layer
Move above all other layers and to the bottom
resize down 2 times by 80%
Open element 33 copy and paste as new layer
resize down 3 times by 60% and move to the bottom Right above all
other layers
open element 15 copy and paste as new layer
resize down 3 times by 60% and move to the bottom Left
open element 14 copy and paste as new layer
resize down 2 times by 60% and again by 80% 1 time
Move above element 15 on the bottom left
open element 24 copy and paste as new layer
resize down by 80% about 6 times
Move to the right below the jewel
open element 13 copy and paste as new layer
resize down 2 times by 60%
Move above all other layers
the heel on the top of the mask
open element 12 copy and paste as new layer
resize down 2 times by 60%
move to the left below the slipper
Open Element 44 copy and paste as new layer
Move above all other layers and to the right of the book
add name copyright and save

Tuesday, August 27, 2013


You can purchase both from His store HERE
Mask is from the Creative Misfits
You can use Mask of choice
New Transpart Raster Layer 700x700
Open paper 3 copy and paste as new layer
Make sure your mask is open
Go to Layer, New Mask Layer From Image
Select from DropDown and hit ok
Merge Group
Resize down 1 time by 90%
Open frame 1 copy and paste as new layer
Resize down 2 times by 80%
Free rotate to the right by 45
Place in the center
Open paper 5 copy and paste as new layer
Move below the frame and erase all parts on the outside
Open your tube layer copy and paste as new layer
Place as desired below tube
Duplicate and move as desired ad merge down.
I have mine to where her face is on the left and chest on the right
Erase all parts on the outside.
add a luminance Legacy
Open tube again copy and paste as new layer
Move above all other layers
Resize down 1 time by 50% and again by 90%
Move to where the bottom of the left foot is at the bottom
corner of the frame
Open the sparkles copy and paste as new layer
Move directly below the frame layer
erase all parts on the outside
Open the toolbox copy and paste as new layer
Move directly above the frame layer
resize down 5 times by 80% Placing on the corner of the frame
open the boombox copy and paste as new layer
Resize down 2 times by 60% and move to the left above the toolbox
open the wrench copy and paste as new layer
Resize down 1 time by 60% and move to the right below the toolbox
open the screwdriver copy and paste as new layer
Resize down 2 times by 60%
Move to the right below the wrench
open the sunglasses copy and paste as new layer
resize down 2 times by 60% and move directly below the tube layer and to the center
open ribbon2 copy and paste as new layer
resize down by 60% 1 time and move directly above the frame
add name copyright and save
Mask is from the Creative Misfits
You can use Mask of choice
New Transpart Raster Layer 700x700
Open paper 3 copy and paste as new layer
Make sure your mask is open
Go to Layer, New Mask Layer From Image
Select from DropDown and hit ok
Merge Group
Resize down 1 time by 90%
Open frame 1 copy and paste as new layer
Resize down 2 times by 80%
Free rotate to the right by 45
Place in the center
Open paper 5 copy and paste as new layer
Move below the frame and erase all parts on the outside
Open your tube layer copy and paste as new layer
Place as desired below tube
Duplicate and move as desired ad merge down.
I have mine to where her face is on the left and chest on the right
Erase all parts on the outside.
add a luminance Legacy
Open tube again copy and paste as new layer
Move above all other layers
Resize down 1 time by 50% and again by 90%
Move to where the bottom of the left foot is at the bottom
corner of the frame
Open the sparkles copy and paste as new layer
Move directly below the frame layer
erase all parts on the outside
Open the toolbox copy and paste as new layer
Move directly above the frame layer
resize down 5 times by 80% Placing on the corner of the frame
open the boombox copy and paste as new layer
Resize down 2 times by 60% and move to the left above the toolbox
open the wrench copy and paste as new layer
Resize down 1 time by 60% and move to the right below the toolbox
open the screwdriver copy and paste as new layer
Resize down 2 times by 60%
Move to the right below the wrench
open the sunglasses copy and paste as new layer
resize down 2 times by 60% and move directly below the tube layer and to the center
open ribbon2 copy and paste as new layer
resize down by 60% 1 time and move directly above the frame
add name copyright and save
Thursday, August 22, 2013
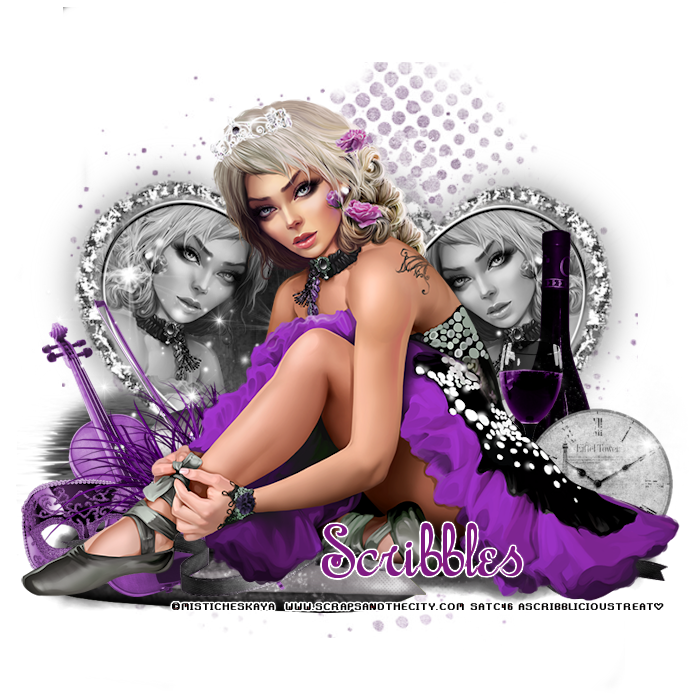
Artwork by Misticheskaya
Matching PTU ScrapKit "Helen" by Disturbed Scraps by Gaby
Both available at Scraps and The City
Both available at Scraps and The City
Mask is Sparkle mask 5 by Sue , available from
the Creative Misfits blog
New Transparent Raster Layer 700x700
Open element 138 copy and paste as new layer
resize down 2 times by 80% place in the center
Open paper 8 copy and paste as new layer
Move below Frame layer
erase all parts on the outside
Open paper 9 copy and paste as new layer
move below paper 8
Open your mask
go to layer, new mask layer
from image select from drop down
Hit ok, Merge group
Hide this layer
Open tube copy and paste as new layer
move below frame layer and place as desired
Erase all parts on the outside Merge down,
Resize down 1 time again by 90% an mirror, Move
to the left duplicate, Mirror and move to the rightt
Erase the part of the right covering the left
Open full tube layer copy and paste as new layer
Resize down 1 time by 90% and move above all other layers
Unhide the mask layer
open element 38 copy and paste as new layer
resize down 1 time by 80% and again by 90%
Move directly above the mask layer
open element 35 copy and paste as new layer
resize down by 80% 2 times and move above all other layers
open tube layer again copy and paste as new layer
resize down 1 time by 80%
Move to the center above all other layers
open element 57 copy and paste as new layer
resize down 1 time by 70%
Move to the left below the tube layer
Open element 30 copy and paste as new layer
resize down by 70% 2 times and move to the right below the tube layer
open element 122 copy and paste as new layer
Resize down 2 times by 90% and move below the tube layer
Open element 12 copy and paste as new layer
Move below the frame layer
resize down 1 time by 90%
open element 101 copy and paste as new layer
resize down 1 time by 60% and move to the right below the clock
open element 102 copy and paste as new layer
resize down 2 times by 60% and move to the right above the sparkle layer
to the left of the wine bottle
open element 29 copy and paste as new layer
resize down 2 times by 60% and move to the left
below the foot of the tube layer
open element 106 copy and paste as new layer
resize down 1 time by 60%
Mirror and move to the left below element 57
open element 85 copy and paste as new layer
resize down by 60% and move to the left directly below
element 57
add name copyright and save
New Transparent Raster Layer 700x700
Open element 138 copy and paste as new layer
resize down 2 times by 80% place in the center
Open paper 8 copy and paste as new layer
Move below Frame layer
erase all parts on the outside
Open paper 9 copy and paste as new layer
move below paper 8
Open your mask
go to layer, new mask layer
from image select from drop down
Hit ok, Merge group
Hide this layer
Open tube copy and paste as new layer
move below frame layer and place as desired
Erase all parts on the outside Merge down,
Resize down 1 time again by 90% an mirror, Move
to the left duplicate, Mirror and move to the rightt
Erase the part of the right covering the left
Open full tube layer copy and paste as new layer
Resize down 1 time by 90% and move above all other layers
Unhide the mask layer
open element 38 copy and paste as new layer
resize down 1 time by 80% and again by 90%
Move directly above the mask layer
open element 35 copy and paste as new layer
resize down by 80% 2 times and move above all other layers
open tube layer again copy and paste as new layer
resize down 1 time by 80%
Move to the center above all other layers
open element 57 copy and paste as new layer
resize down 1 time by 70%
Move to the left below the tube layer
Open element 30 copy and paste as new layer
resize down by 70% 2 times and move to the right below the tube layer
open element 122 copy and paste as new layer
Resize down 2 times by 90% and move below the tube layer
Open element 12 copy and paste as new layer
Move below the frame layer
resize down 1 time by 90%
open element 101 copy and paste as new layer
resize down 1 time by 60% and move to the right below the clock
open element 102 copy and paste as new layer
resize down 2 times by 60% and move to the right above the sparkle layer
to the left of the wine bottle
open element 29 copy and paste as new layer
resize down 2 times by 60% and move to the left
below the foot of the tube layer
open element 106 copy and paste as new layer
resize down 1 time by 60%
Mirror and move to the left below element 57
open element 85 copy and paste as new layer
resize down by 60% and move to the left directly below
element 57
add name copyright and save
Tuesday, July 30, 2013

Artwork on Ninaste
PTU Scrap Kit from Bibi's Collection City of angels
New Transparent Raster Layer 700X700
open paper 2 copy and paste as new layer
open element 15 copy and paste as new layer
Place in the center above the paper
erase all parts of the paper on the outside
open your full tube layer, copy and paste as new layer
resize down by 80% 1 time, move below element 15
Erase all parts on the outside and add a luminance legacy
Merge the frame, paper and tube layer and move to the right just a little
open the full tube again copy and paste as new layer
resize down 2 times by 80% and Mirror, Move to the left
open element 74 copy and paste as new layer
resize down 1 time by 80% and move below the full tube layer
to the bottom
Open element 91 copy and paste as new layer
resize down 2 times by 80% and move below element 74
open element 47 copy and paste as new layer
Move above all other layers and to the right
covering the right foot
open element 48 copy and paste as new layer
Move to the right center below element 74
open element 28 copy and paste as new layer
move below all other layers and resize down 4 times 80%
open element 23 copy and paste as new layer
resize down by 80% 1 time and move below full tube layer
And to the left
open element 16 copy and paste as new layer
Move to the top right above all other layers
resize down by 80% about 3 times
Place at the top of the frame and to the right
add name copyright and save
PTU Scrap Kit from Bibi's Collection City of angels
New Transparent Raster Layer 700X700
open paper 2 copy and paste as new layer
open element 15 copy and paste as new layer
Place in the center above the paper
erase all parts of the paper on the outside
open your full tube layer, copy and paste as new layer
resize down by 80% 1 time, move below element 15
Erase all parts on the outside and add a luminance legacy
Merge the frame, paper and tube layer and move to the right just a little
open the full tube again copy and paste as new layer
resize down 2 times by 80% and Mirror, Move to the left
open element 74 copy and paste as new layer
resize down 1 time by 80% and move below the full tube layer
to the bottom
Open element 91 copy and paste as new layer
resize down 2 times by 80% and move below element 74
open element 47 copy and paste as new layer
Move above all other layers and to the right
covering the right foot
open element 48 copy and paste as new layer
Move to the right center below element 74
open element 28 copy and paste as new layer
move below all other layers and resize down 4 times 80%
open element 23 copy and paste as new layer
resize down by 80% 1 time and move below full tube layer
And to the left
open element 16 copy and paste as new layer
Move to the top right above all other layers
resize down by 80% about 3 times
Place at the top of the frame and to the right
add name copyright and save
Wednesday, July 24, 2013

Art work of Arthur Crowe
Matching Kit Sencitive by Rissas Designs
Mask of choice I am using one from Weescotslass Creations
New transparent Raster layer 700x700
open paper 4 copy and paste as new layer
Go to Layer, New Mask Layer from Image, select from dropdown
hit ok
Merge Group
resize down 1 time by 80% and adjust to where it is centered
Open frame 1 copy and paste as new layer
Placing center above the mask layer
Open the City Scape copy and paste as new layer
move above all other layers and to the top a little
open the tube copy and paste as new layer
resize down 1 time by 80% and move to the bottom center above all other layers
Open the discoball copy and paste as new layer
Move above th cityscape and resize down 4 times by 80%
Move down to where it is below the tube and looks to where it is
at the botto of the cityscape
open the guitar copy and paste as new layer
resize down 1 time by 80% Free rotate to the left by 30
and move to the left below the tube layer
open musicnote2 copy and paste as new layer
resize down 2 times by 50% and place as desired
Duplicate as many times as u want and spread them around
repeat with Musicnote1
(you may need to resize alittle more)
open bow 2 copy and paste as new layer
resize down 2 times by 50% and move to the top
above all other layers
Placing in the center
open the flamepop copy and paste as new layer
resize down 1 time by 80% and move to the left
below the Guitar
Open the wire copy and paste as new layer
resize up by 120 %
Go to Layer, New mask layer from image
select from drop down click ok and merge group
Merge group and move below all other layers
Add name copyright and save as a PNG.

Matching Kit Sencitive by Rissas Designs
Mask of choice I am using one from Weescotslass Creations
New transparent Raster layer 700x700
open paper 4 copy and paste as new layer
Go to Layer, New Mask Layer from Image, select from dropdown
hit ok
Merge Group
resize down 1 time by 80% and adjust to where it is centered
Open frame 1 copy and paste as new layer
Placing center above the mask layer
Open the City Scape copy and paste as new layer
move above all other layers and to the top a little
open the tube copy and paste as new layer
resize down 1 time by 80% and move to the bottom center above all other layers
Open the discoball copy and paste as new layer
Move above th cityscape and resize down 4 times by 80%
Move down to where it is below the tube and looks to where it is
at the botto of the cityscape
open the guitar copy and paste as new layer
resize down 1 time by 80% Free rotate to the left by 30
and move to the left below the tube layer
open musicnote2 copy and paste as new layer
resize down 2 times by 50% and place as desired
Duplicate as many times as u want and spread them around
repeat with Musicnote1
(you may need to resize alittle more)
open bow 2 copy and paste as new layer
resize down 2 times by 50% and move to the top
above all other layers
Placing in the center
open the flamepop copy and paste as new layer
resize down 1 time by 80% and move to the left
below the Guitar
Open the wire copy and paste as new layer
resize up by 120 %
Go to Layer, New mask layer from image
select from drop down click ok and merge group
Merge group and move below all other layers
Add name copyright and save as a PNG.
Tuesday, July 23, 2013

art work of Mistichekaya, you can purchase at Pics For Design
PTU ScrapKit Garden Delight by Jennys Designz
you can purchase at Sweet Pinups
PTU ScrapKit Garden Delight by Jennys Designz
you can purchase at Sweet Pinups
New transparent Raster layer 700x700
frame 4 copy and paste as new later
resize 1 time by 90%
Free rotate to the left by 30
duplicate and mirror
open paper 4 copy and paste as new layer
move below the frame layer and erase all parts on the outside
open the tube copy and paste as new layer
Move above the paper layer
erase all parts on the outside of the frame
add a luminance
Open tube again
resize down 1 time by 80% and move above all other layers
open the sparkles copy and pasre as new layer
move below full tube layer
to the left, Duplicate and move to the right
open the basket copy and paste as new layer
resize down 2 times by 80%
Move to the right above the sparkles and below the full tube layer
duplicate and move to the left
open the butterflys copy and paste as new layer
Move above the frame layer
Erase all parts covering the tube
open cat2 copy and paste as new layer
resize down 3 times by 80% and Move to the left above all other layers
Open stones copy and paste as new layer
resize down 1 time by 80% and move directly above the sparkle layers
open flower2 copy and paste as new layer
resize down 2 times by 80% and move below the tube layer and to the right
Duplicate and move to the left
Open flower3 copy and paste as new layer
resize down by 80% as desired and move to the right above all other layers
add name copyright and save
Subscribe to:
Posts
(Atom)
STAMPS


